

Hi! First I want to say many thanks to Anna of Noodlehead for inviting me to participate in her 'Spice Up Your Kitchen' week. It's been a challenge to say the least to try to come up with something worthy of all the fabulous talent going on over there!
I am an organization freak. I think that I enjoy the process more than the end result. Which is a good thing since nothing stays organized for long with 2 kids running around the house; my wild and inquisitive 2 year old daughter and my 29 year old man-child/husband, to be specific. I haven't decided who's worse in undoing all of my hard work! So, when Anna asked me to come up with something kitchen-y, my first thought was to create something to cut down on the coupon clutter on my kitchen table. I spend a lot of time at that table and am constantly fighting with the pile of stuff that lives there. Then I got to thinking about how I'd love to start adding some new recipes to the dinner mix, and the Meal Planning Organizer was born.
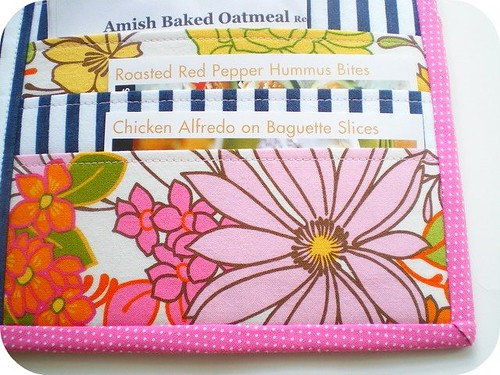
The general idea is that there are seven pockets in this organizer that you could use to hold the recipe cards for all the meals (or just dinners if you are like me) you plan to cook for the week. Use the notepad to jot down ingredients you'll need to pick up, and if you have or come across coupons that can be used, tuck them into the organizer pockets as well. When you're ready to go to the grocery store, you'll have your list and coupons ready to go. This organizer has magnets on the back so it will hang on your fridge!
Terms of use: Personal use only! Thanks


1. First, fuse the Craft Fuse to your main fabric piece and notepad pocket piece. Then, fold each of the 7 small pocket pieces in half lengthwise and press. Open back up. Using the crease as a guide, place the interfacing on the bottom half (wrong side of fabric) of each pocket and fuse.

2. Fold each pocket piece in half, wrong sides touching, and top stitch along the top of each piece.

3. Using your ruler, draw a line on each pocket piece a 1/4 of an inch from the bottom raw edge. This will be your stitch guide. Set these aside for the moment.

4. Take the 7.5" strip of binding, fold in half, and press. Open and fold in each half to meet in the middle, press. Fold in half, and press. Line the right edge of the unfolded binding to the top of the notepad pocket piece and stitch in place. Fold over to the back side, pin in place, and top stitch. Now, take the entire pocket piece and line it up with the left bottom corner of your main fabric piece. Baste in place.


5. To the right of the pocket you just basted, starting 1" from the bottom, draw six lines 1" apart. Then, starting with the top line, place a pocket piece with raw edges lining up with the line you just drew. Stitch the pocket in place using the 1/4" line you drew earlier on the pocket pieces. Continue this process to the very bottom of the main piece. The raw edges of the last pocket piece will align with the bottom edge of the main piece. Once you have all your pocket pieces sewn in place, use your ruler and rotary cutter to even up the right edge of the organizer.


6. Now, we're going to take the 2 x 11" binding strip and fold it in half. Press and open back up. Fold in both sides to meet in the middle and press. Place the corresponding piece of Craft Fuse in the middle, centered so that a 1/2 inch of fabric is on either side. Fuse. With the wrong side of the strip facing you, line up the left unfolded edge of strip with the left edge of the 7 pocket pieces. Leave right side of strip folded. I like to use binder clips to hold the strip in place on both ends. Stitch in place, using the left edge of interfacing as your stitch guide (1/2" seam allowance). Now, fold the strip over the line you just stitched and press flat. View photos below for clarification.


7. Continuing, we're now going to fuse what you've sewn together so far to the Peltex Two Sided Fusbile stuff. Lay the Peltex (Plastic coated side DOWN-leave the plastic on for now) on your ironing board. Place your main fabric piece face up on top of the Peltex. Fuse, using lots and lots o' steam. When it has cooled off, head back over to the sewing machine. Remove the plastic from the bottom. I forgot to do this so no big if you do too. You can always peel it off after you sew. Grab that elastic I told you about, fold it in half and tuck it under the middle strip bout 4 1/4" down from the top. This will be your pen holder. Top stitch along both long edges of the middle strip you just sewed. While sewing through all this stuff makes it a bit tougher, it joins all the pieces together and makes things sturdier. Then, flip your organizer over, wrong side up, and fuse your backing fabric. At this point, all this is left to do is add your bias tape around the edges and glue on some magnets!


8. Sew on your bias tape. I used the edge of my presser foot as the seam allowance to make sure I'd have enough fabric to fold over to the back. It was a bit tough sewing through all these layers, but doable. I just went really slowly, used a size 16 needle (maybe a jeans needle would be even better), and used my walking foot. Until this project, I've never sewn bias tape with mitered corners or hand sewn the back. All new to me. I found this tutorial explains it quite well. I realized the binding was going to have to be hand stitched in the back vs top stitching for it to look pretty since I couldn't pin through all the layers so that's what I did.


9.Once you've got your bias tape on, grab the glue gun and magnets. I used 3 magnets, which might be overkill, but I wanted to make sure this puppy stayed on the fridge. I just put one on both upper corners along with one in the center. If you want to hang the organizer somewhere other than the fridge, large silver grommets in the upper corners would look snazzy! Voila. It's done. Now go hang it on your fridge and order out for dinner. Cooking can wait til tomorrow ;)


Let's get started:
Supplies:
Fabric:
{1} 11 x 15" Main Fabric
{1} 11 x 15" Backing
{7} 6 x 7.5" Recipe/Coupon Pockets
(3 of one print and 4 of another if you want alternating prints)
{1} 8 x 7.5" Notepad Pocket
{1} 2 x 7.5" Binding for Notepad Pocket
{1} 11 x 2 " Binding for middle of organizer
*not pictured
{1} Package Bias Tape or approx 60" if you want to make your own
*not pictured
Interfacing:
{1} 11 x 15" 72 Peltex II -Double Sided Fusible Ultra Firm Stabilizer
Pellon Craft Fuse
{1} 11 x 15"
{7} 2.75 x 7.5"
{1} 11 x 1"
Other Supplies:
Hi Temp Glue Gun and Glue
4 Craft Magnets
{1} Scrap Piece of 1/2 inch Elastic approx 2.5" long
Small Binder clips (easier to use than pins when working with thick layers)
{1} Scrap Piece of 1/2 inch Elastic approx 2.5" long
Small Binder clips (easier to use than pins when working with thick layers)
Ruler
Fabric Marking Pen
*Size 16 or larger needle! You're going to be sewing through some serious thickness so you'll need a sturdy needle.
Hand Sewing Needle, Thread, Rotary Cutter, Pins, and the usual sewing stuff


1. First, fuse the Craft Fuse to your main fabric piece and notepad pocket piece. Then, fold each of the 7 small pocket pieces in half lengthwise and press. Open back up. Using the crease as a guide, place the interfacing on the bottom half (wrong side of fabric) of each pocket and fuse.

2. Fold each pocket piece in half, wrong sides touching, and top stitch along the top of each piece.

3. Using your ruler, draw a line on each pocket piece a 1/4 of an inch from the bottom raw edge. This will be your stitch guide. Set these aside for the moment.

4. Take the 7.5" strip of binding, fold in half, and press. Open and fold in each half to meet in the middle, press. Fold in half, and press. Line the right edge of the unfolded binding to the top of the notepad pocket piece and stitch in place. Fold over to the back side, pin in place, and top stitch. Now, take the entire pocket piece and line it up with the left bottom corner of your main fabric piece. Baste in place.


5. To the right of the pocket you just basted, starting 1" from the bottom, draw six lines 1" apart. Then, starting with the top line, place a pocket piece with raw edges lining up with the line you just drew. Stitch the pocket in place using the 1/4" line you drew earlier on the pocket pieces. Continue this process to the very bottom of the main piece. The raw edges of the last pocket piece will align with the bottom edge of the main piece. Once you have all your pocket pieces sewn in place, use your ruler and rotary cutter to even up the right edge of the organizer.


6. Now, we're going to take the 2 x 11" binding strip and fold it in half. Press and open back up. Fold in both sides to meet in the middle and press. Place the corresponding piece of Craft Fuse in the middle, centered so that a 1/2 inch of fabric is on either side. Fuse. With the wrong side of the strip facing you, line up the left unfolded edge of strip with the left edge of the 7 pocket pieces. Leave right side of strip folded. I like to use binder clips to hold the strip in place on both ends. Stitch in place, using the left edge of interfacing as your stitch guide (1/2" seam allowance). Now, fold the strip over the line you just stitched and press flat. View photos below for clarification.


7. Continuing, we're now going to fuse what you've sewn together so far to the Peltex Two Sided Fusbile stuff. Lay the Peltex (Plastic coated side DOWN-leave the plastic on for now) on your ironing board. Place your main fabric piece face up on top of the Peltex. Fuse, using lots and lots o' steam. When it has cooled off, head back over to the sewing machine. Remove the plastic from the bottom. I forgot to do this so no big if you do too. You can always peel it off after you sew. Grab that elastic I told you about, fold it in half and tuck it under the middle strip bout 4 1/4" down from the top. This will be your pen holder. Top stitch along both long edges of the middle strip you just sewed. While sewing through all this stuff makes it a bit tougher, it joins all the pieces together and makes things sturdier. Then, flip your organizer over, wrong side up, and fuse your backing fabric. At this point, all this is left to do is add your bias tape around the edges and glue on some magnets!


8. Sew on your bias tape. I used the edge of my presser foot as the seam allowance to make sure I'd have enough fabric to fold over to the back. It was a bit tough sewing through all these layers, but doable. I just went really slowly, used a size 16 needle (maybe a jeans needle would be even better), and used my walking foot. Until this project, I've never sewn bias tape with mitered corners or hand sewn the back. All new to me. I found this tutorial explains it quite well. I realized the binding was going to have to be hand stitched in the back vs top stitching for it to look pretty since I couldn't pin through all the layers so that's what I did.


9.Once you've got your bias tape on, grab the glue gun and magnets. I used 3 magnets, which might be overkill, but I wanted to make sure this puppy stayed on the fridge. I just put one on both upper corners along with one in the center. If you want to hang the organizer somewhere other than the fridge, large silver grommets in the upper corners would look snazzy! Voila. It's done. Now go hang it on your fridge and order out for dinner. Cooking can wait til tomorrow ;)
*I used 3 magnets on mine as pictured, but think using 4, one in each corner, would work better now that I've had mine on the fridge for a few days. It tends to shift somewhat when putting things in and out of the pockets and one in each corner would probably alleviate that if it's an issue for anyone!

If you have ANY questions or find any glaring errors feel free to comment or email me at sevan76dress {at} gmail {dot} com
And if you whip one of these up, go post your photots in the LBG Studio Flickr group!
Terms of use: Personal use only, please! Thanks
Thanks and enjoy!

Oh my goodness, I love it! I sooo need one of these. My kitchen table (and by extension, the rest of the kitchen) is chaos from coupons, recipe cards, and other little notes. And I am always losing the cards I write down my grocery lists and menu plans on. This is at the top of my to-do list now. Thanks for sharing!
ReplyDelete--Lu of just Lu
It's beautiful, can't wait to try it. Thanks for sharing.
ReplyDeleteThis is FANTASTIC! Nice job!
ReplyDeleteWhat a fun idea. I'm so happy to "meet" you.
ReplyDeletegreat job vanessa! so pretty. your fabric choices are perfect! I would love to be that organized...
ReplyDeleteThat is wonderful!!!
ReplyDeleteWOW!! What a great tutorial! Just what I needed to start menu planing and organizing all the many loose papers and coupons that magically pile up all the time in the corner of the kitchen counter.
ReplyDeleteI put this tutorial on my "to make" list on my blog :)
Thank you!! Thank you! Thank you!
xoxoxo
This is fabulous! Great tutorial, too.:)
ReplyDeleteI love this, it's so perfect for my kitchen and all my plans to only get what i need at the grocery store and for cleaning up my eating habits! Thanks so much for posting this. Also i see you have the recipe for Amish Oatmeal and was wondering if you would be willing to share that with me! :) i ate it one time at a friends house and forgot to get the recipe from her! thanks a million!
ReplyDeleteWow, I'm in love. I will definitely be making this for our kitchen. Thanks for the tutorial!
ReplyDeleteUmmmm, I found my way here from Noodlehead...then to your shop where I find you are using same patterns that I am or have been using(Buttercup, KeyKaLou, MadeByRae and patchwork on your little bags. I feel like I have found a soulmate out there. I started selling on etsy last August also. I am sooooo impressed with your work and your photos. You really have a winner..shop, blog, flickr and all.
ReplyDeletecoming over from noodlehead. i love this project. just what i need to get organized and make something pretty at the same time. thanks!
ReplyDeleteVanessa, Great idea!!! I cannot wait to try this - I soooo need one of these. Your tutorial is awesome - good job!
ReplyDeletethis is such a great idea! meal planning is such a must and this is a very stylish way to do it! very cool.
ReplyDeletei'm visiting from noodlehead, i LOVE this tutorial. it is soo functional, unique and the fabrics are beautiful!
ReplyDeletewhat is the floral fabric? I MUST have some. I love this project. Very cute!
ReplyDeleteThis is so awesome!! I linked to your tutorial on Craft Gossip Sewing:
ReplyDeletehttp://sewing.craftgossip.com/tutorial-sew-a-menu-planning-organizer-for-your-kitchen/2010/05/23/
--Anne
Lindsey, and anyone else wondering about the fabric:
ReplyDeleteThe main fabric piece is Joel Dewberry's Ginseng Pine in Celery
(it's out of print but you may be able to track some down somewhere)
The pink polka dots I picked up at Joann's
As for the blue stripes and the floral print. . . .sadly, I don't know. A friend sent me a huge box of scraps a while back and those were in it. If anyone knows what the floral print is, let me know! I love it and need more.
This is awesome! Thanks so much for the tutorial. Going to make one for the mother in law for Christmas...and then one for ME! :)
ReplyDeleteUpdate! I tracked down the floral print. It's discontinued as well though. It's Robert Kaufman, Vera's Garden - Summer.
ReplyDeleteYou can order some !
here
Wow, I've been looking for something to make for my Mom for a birthday present and this looks to be it. Many thanks, can't wait to try out your tutorial. When I make this it will be posted on my blog with reference to your as well :)
ReplyDeleteAww, I love it! It's so useful and it's really, really pretty! Thanks so much, I'll be linking.
ReplyDeleteOhhhh....this is gorgeous! So smart!
ReplyDeletei love your creations! they are so smart and cute! i'm going to be your follower. have a nice day, CIAO from italy! linda
ReplyDeleteThis is a great project! Too bad every time I set foot in the kitchen, smoke detectors go off. (Yesterday it was two at once, I don't know how I do it!) Maybe if I sewed a menu organizer, my sweetie would do the cooking?
ReplyDeleteGreat project! I actually can see myself using this for mail too! Thanks so much!
ReplyDeleteOh, this is CUTE! I wonder if it would help me with meal planning. At a minimum, it would be better than piling recipes haphazardly on the counter... I linked to it on my weekly roundup - thanks so much for sharing!
ReplyDeletei love it! the idea of putting the recipes in the pockets is just genius! thanks for sharing!
ReplyDeletei love it! the idea of putting the recipes in the pockets is just genius! thanks for sharing!
ReplyDeleteI posted your tutorial on my blog:
ReplyDeletehttp://lilbitsassy.blogspot.com/2010/06/tutorial-tuesday-meal-planning.html
Bonne idée ! :)
ReplyDeleteCan I buy one of these in your shop? I don't sew. Thanks1
ReplyDeletethis is amazing!!! definately making one of these in the new year to get myself organised! :)
ReplyDeleteThis is EXACTLY what I need! Thanks for posting it. :)
ReplyDeleteadorable I'm going to have to make one of these for my kitchen
ReplyDeletehttp://mommypants13.blogspot.com
Thanks for the tutorial! It will save me so much time.
ReplyDeleteI got one from pocketful of posies and it was TERRIBLE....the laminated pouch was falling apart and the magnets fell off I guess in the mail because they were separate. (Not to mention the half the recipes had much to be desired...chili dogs...open can of chili, put on hotdogs...seriously, are you kidding me??
I wrote them a few messages complaining and had no responses so I don't feel badly about sharing my experience.
oh you so should make them and sell them for us non creative ppl lol
ReplyDeleteBrilliant! Thanks so much for sharing this tutorial. I love anything which helps me get more organised.
ReplyDeleteWow! Super cute!
ReplyDeleteThis looks really cute! thanks for sharing the tutorial.
ReplyDeleteI found you thru ~ http://hoosierhomemade.com
Melissa
Too bad every time I set foot in the kitchen, smoke detectors go off. ... badezimmerset.blogspot.de
ReplyDeleteSo, when Anna asked me to come up with something kitchen-y, my first ... ikitchentablessets.blogspot.com
ReplyDeleteI spend a lot of time at that table and am constantly fighting with the ... ismallkitchentables.blogspot.com
ReplyDeleteOMG! I've never seen this pattern! I am making one of these....thank you!
ReplyDeleteThank you so much for the tutorial...this is an answer to helping me stay organized....
ReplyDelete